

Recently, thanks to the abundance of Facebook yard sale pages in our area, my name is getting out there as someone who would gladly refinish your furniture for you (btw, thank you friends). Unfortunately, it seems that everyone is looking for me to do it out of the kindness of my heart or practically for free. I consider myself to be a generous person but this is how I make a living, this is how I provide for my daughter. I began to feel frustrated and defeated when I wouldn't hear back from the person I provided a ballpark figure for. Then it dawned on me...maybe the non DIY'ers out there don't understand what all goes into turning an old, weathered piece of furniture into a piece that will stand the test of time & be passed down for generations. Sure, I could just throw a coat or two of spray paint on it and give it back to you for $50 but you would be very dissatisfied and unhappy with the service I provided you. Let me explain to those who will listen what goes into providing a stunning piece of refinished furniture.
First there is the cleaning. I have come close to losing my much lunch on several occasions during this step. I STRONGLY suggest a mask, goggles and latex gloves (and maybe a barf bag):


Depending on the condition of the piece of furniture you're refinishing you may need to strip a few layers of paint off in order to get the desired finish you're looking for. FYI chemical burns hurt, people:

Hopefully you'll be one of the lucky ones and won't find any hidden gems under all of that paint:
 |
| Heat mark from a baked potato
|


Now it's time to patch, fill and sand the dickens out of it:
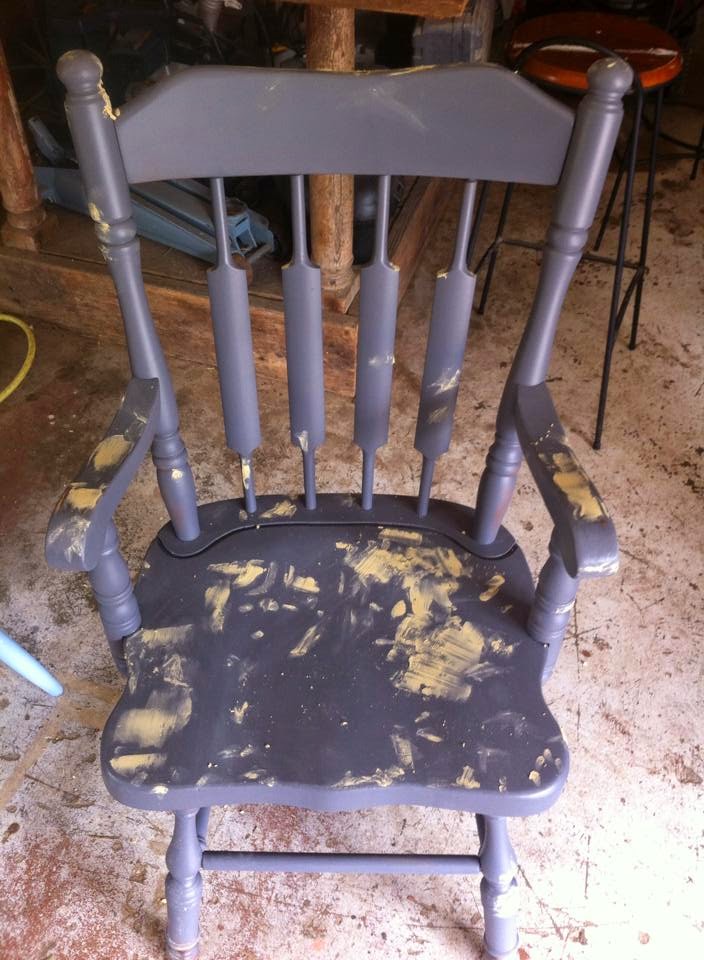
It's time to prime! Priming is a very important step in order for the paint to adhere to the furniture properly. Apply one coat of primer, let dry and then hand sand the entire piece with a very fine sanding block until it's smooth like butta (there is a huge difference in smoothness after sanding). Repeat one to two times depending on the primer and coverage. Kilz oil based primer is my primer of choice:

FINALLY...it's time to paint. I trek out to my preferred place of paint mixing (Ace is the place with the helpful hardware folks) and find the color you desire. I usually stick with Benjamin Moore but Clark and Kensington has come a long way. While I'm there I also pick up all of the roller covers, extra sanding blocks and anything else I may need to complete your beautiful project. Apply one coat, dry, sand, repeat...1-2 times.
Ahh...at last, you're done. Hahahaha, not so fast. You now have to apply two to 3 coats of finish if you would like your gorgeous piece of furniture to last through moves, children and every day wear and tear. This is by far my least favorite step. I call it the finicky finishing step (there MAY be another F word in there by the time I get here). You have to be very attentive and patient during this process, one wrong move and you're starting over from the beginning, which is never fun, trust me. If I applied paint to the furniture I use water based polycrylic, if I applied stain I use oil based polyurethane. TDF TIP: If you don't want your beautifully painted, white dresser to yellow over time DO NOT use polyurethane to finish the project. I hope you picked up that pricy synthetic brush while you were at the hardware store because not just any brush will do (I'm not being sarcastic here, no brush has worked for me but the Purdy Syntox brush). Apply a thin, even coat over the entire piece of furniture, be sure to only brush in one direction to eliminate brush marks and avoid over brushing to cut down on bubbles. Let dry for several hours. Grab that super fine sanding block again and get to sanding (do your arms hurt yet). I'm not over exaggerating when I tell you that you will need at least two coats of protective finish but three would provide the best protection.


Clearly I don't use chalk paint. I've tried it before and didn't like the finished product but I kind of wish I did so I could eliminate a few of these steps and save myself some time.
So I wonder...how much would you charge to paint a large dresser or a dining room table and six chairs for someone? Owning your own business and knowing your worth isn't always easy but I've quickly learned that the people who are looking for great quality and durability won't mind paying for it and I can't get offended if someone thinks my prices are too high, to each their own.
Just remember when you're requesting quotes for someone to do any kind of work for you, whether it's furniture refinishing, house cleaning or lawn mowing, you get what you pay for so be cautious of the cheap guys.


